
Building DataMiner Gold (DMG) Queries
Reports > DataMiner Gold
DataMiner Gold is a simple query tool that will let you utilize information from your database.
The batch listing display will show all of the Query’s that have been created and saved using DataMiner Gold. Once a Query has been saved it can be run whenever it is needed. The results of the Query will update to match the current data within the database.
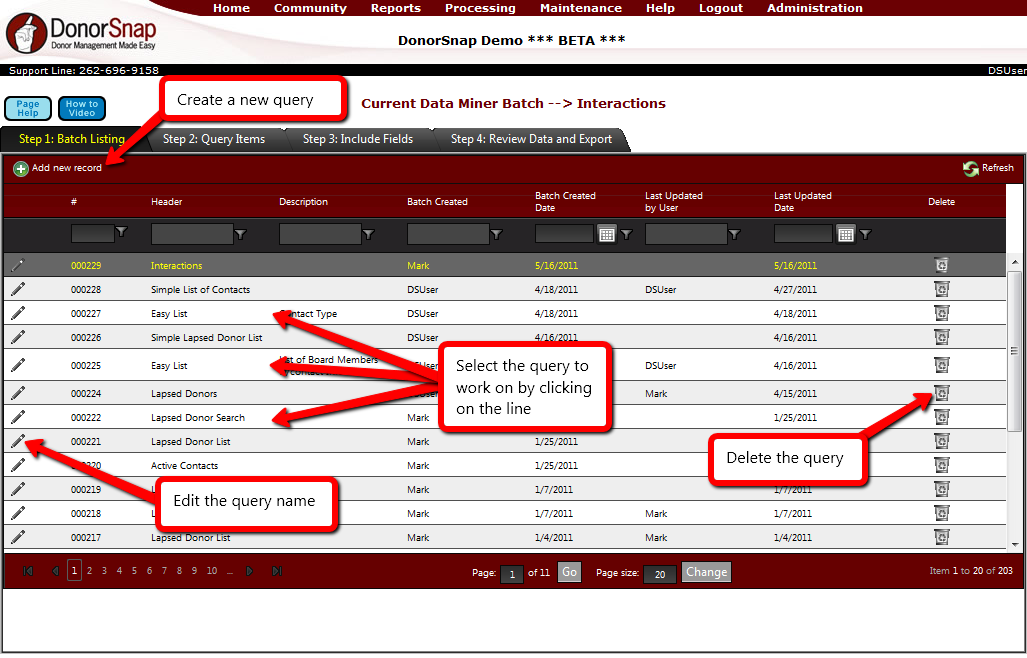
To add a query you simply click on the “Add new record” button and a window similar to above will open. The Batch Header is a short name you can give to your Query. Batch Description allows you to describe the query in more detail so that you’ll remember what its purpose is later on when returning to DataMiner Gold.
Query Items
Step 2 of the DataMiner Gold Query process is where you will specify which Contact records from their database they would like included in the final results. This is the actual query building step. DataMiner Gold builds a table of Contacts that meet the specifications for the query. Step 2 identifies those records that will ultimately be in the results. The subsequent steps (3 & 4) allow you to specify what data fields you want to see in the final results and to actually review the results of your query. Move between steps as often as you’d like to see the results of your query and to modify it to meet your needs.
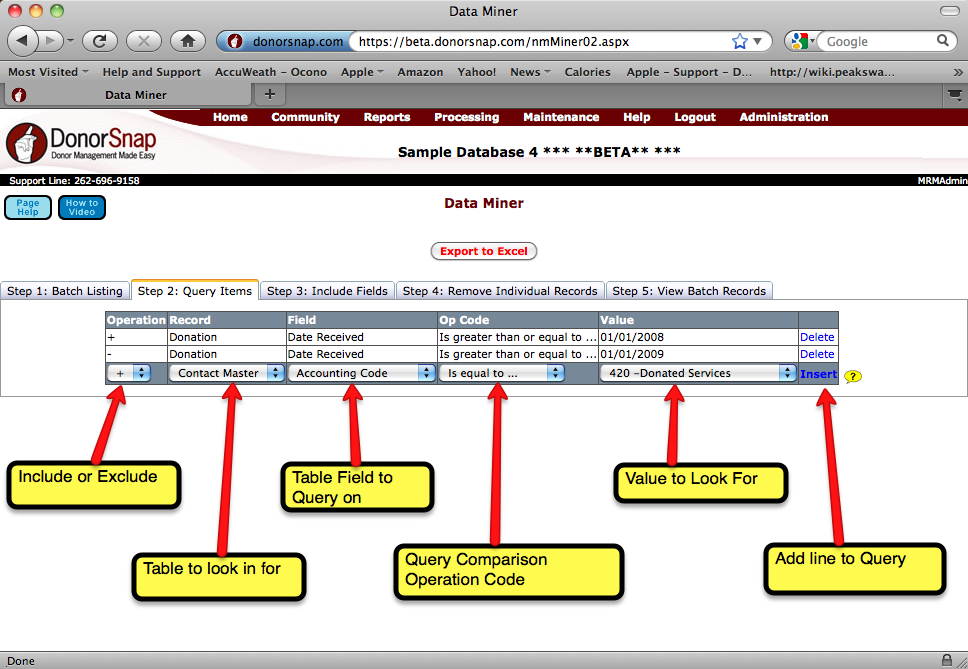
In Step 2 the cursor will be positioned on the last line in the Query Grid that has Gray around each of the boxes and the word “Insert” at the end. This is the row where you will add your next query condition into your query. The line with the word “Insert” is not yet part of the query itself. When adding another line to the query the following dropdown boxes need to be completed:
Operation– This dropdown can either be a “+” or a “-“. If it is a “+” (Include) then any Contact within your Database that meets the criteria on this line will be added into your results. In a more complex query, you may have a record that matches several “include” conditions. That is alright. The record will only show up once in the final results. If you specify “-” (exclude) then any record that might have been in your results will be excluded if it meets the criteria. Although the order of entry does not matter, any record that meets an “Exclude” criteria will not be present in your final results even if it meets 1 or more include criteria.
Record – This is the table within DonorSnap that you want to search to find a specific query condition. This could be the Contact Master, Donation, Volunteer or Interaction Tables.
Field – Once you have specified the appropriate table to search, then the available fields for that table will be available in the Field dropdown. Select the field with the value you wish to examine in this query line. The available Op Codes will depend upon the actual Field that is being chosen for inspection.
Op Code – This is the “test” or comparison that you would like to perform between the Field from your table and the Value that gets entered after you supply the Op Code.
Value – This is the value that you’d like to compare with the contents of the Field to determine whether or not to “Include” or “Exclude” this contact record from the final results.
Once you’ve completed filling in the appropriate dropdown boxes, “Insert” the query line into your query before it will be saved. Once inserted, the word “Delete” will appear on the far right. Delete a query line by selecting Delete at anytime. As mentioned previously, the order of the query lines does not matter in DataMiner Gold.
Include Fields
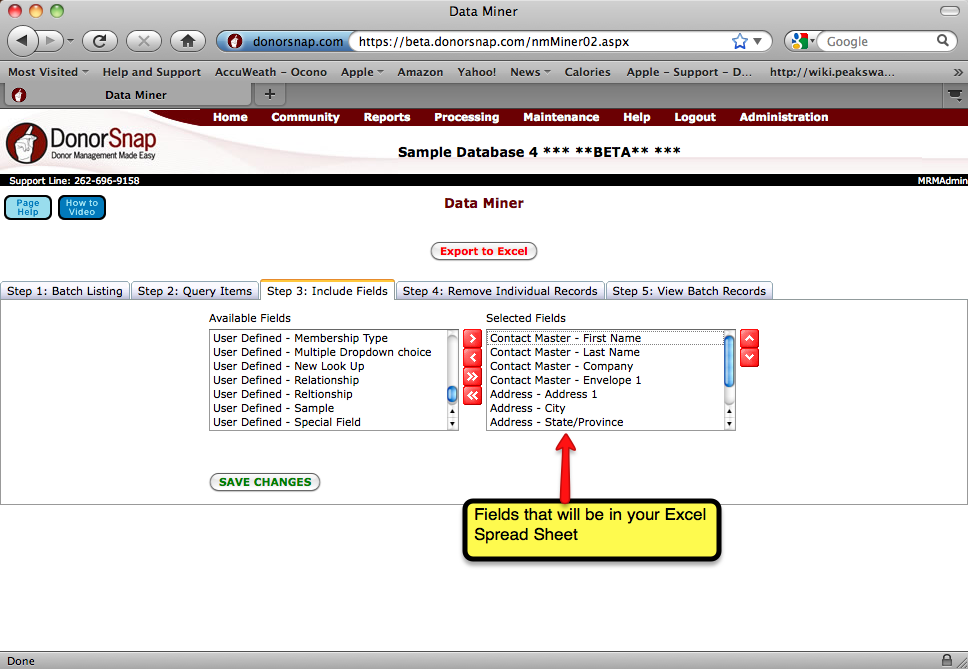
Step 3 of the DataMiner Gold query process is where you specify which fields from your Contact Master you’d like to see in the resulting Excel spreadsheet. Initially DonorSnap places some frequently used fields in the Selected Fields grid. Add in more fields from the Available Fields grid or remove fields by using the control buttons in the middle in red.
Select a single field by clicking on it. You can select multiple fields by holding down the “Ctrl” (or Command) key and clicking on the various fields you wish to move. You can select a range of fields by clicking on the first field in the range and then holding down the “Shift” key and clicking on the last field in the range.
The order of appearance of the fields in the Excel spreadsheet can be changed by highlighting a field or group of fields in the Selected Fields list and moving them up and down with the red arrows on the left of the box. DataMiner Gold does not have the advance drag and drop features that are found in DataMiner Platinum so you can not drag a field to the top of the grid. You’ll need to click the up arrow successively to get the field to appear at the top.
Remember to click the “Save” button when you have the field list set the way you’d like it. No changes will be saved to DonorSnap until the Save button is pushed. If you navigate away from this page without pushing save, your changes will be lost.
Review and Export
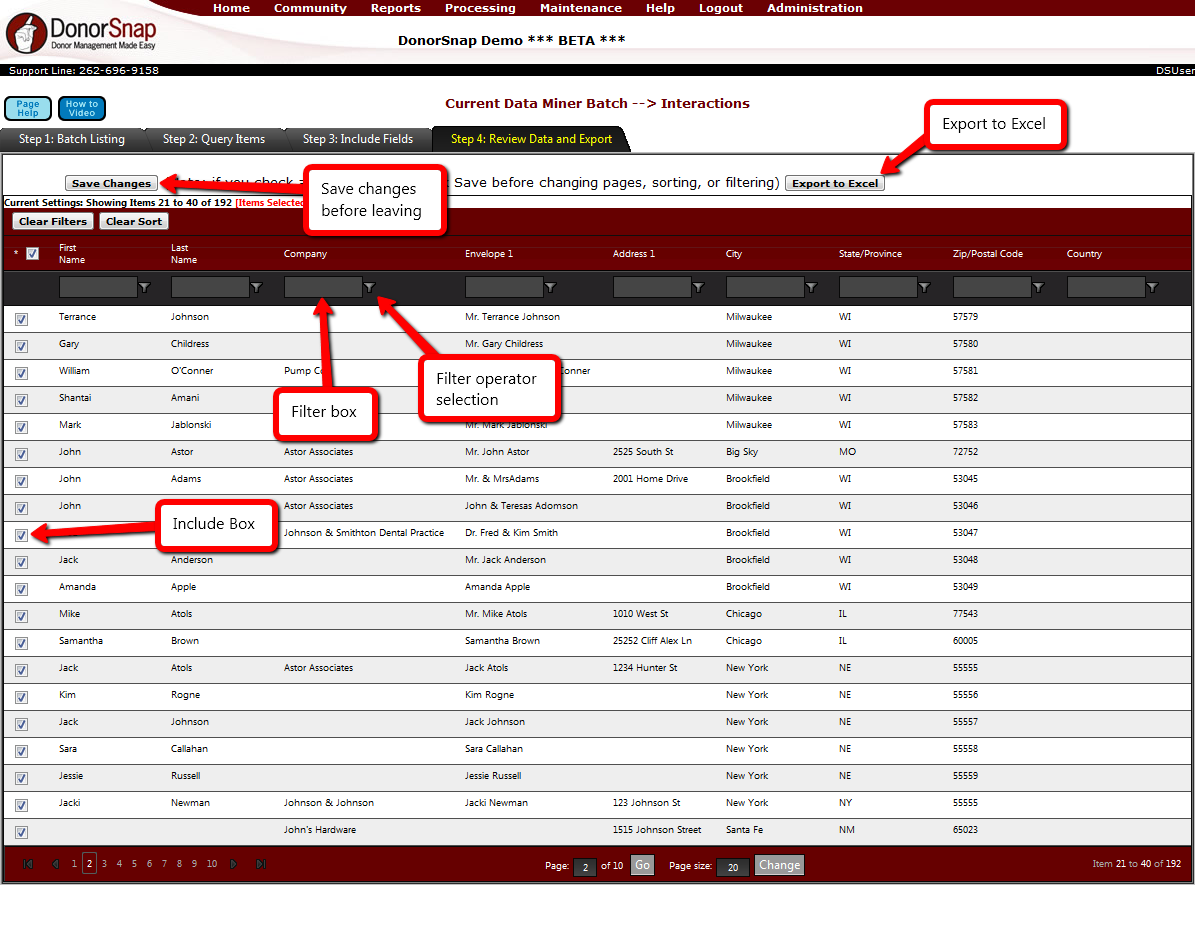
Step 4 of the DataMiner Gold query will display the records that have been selected based upon the Query Items entered in Step 2. The resulting records will be displayed in a grid with the Columns having been the fields that you chose for export in Step 3 of the process. Often times your resulting query will exceed the 20 records per page that can be displayed in the grid. On both the bottom of the grid the available pages will be listed to allow you to step through your data while reviewing it. You can click on any page number to jump directly to that page. DataMiner Gold now has the advanced grid features that are built into DataMiner Platinum. You can sort and filter in the way way as the rest of DonorSnap. Sort by clicking on the column heading once to sort the column ascending, a second time for descending and a third time to put the data back into its original order.
In the review step, the user has the ability to deselect specific records to be excluded from the final export. To exclude a record, simply uncheck the box to the left of the record you wish to exclude. Once you are done reviewing a specific page, make sure to “Save Remove Changes” before jumping to another page. These specific exclusions will be saved in the database for this specific query and those records will be excluded each time the query is run until the specific exclusion is removed (simply check the box and save the page).
This step also displays the records as they will be exported to Excel. Prior to exporting you should briefly review the data to determine that the query is working as you had envisioned. To export the records simply click on the “Export to Excel” button on the top of the page. If you are not satisfied with either the records being chosen or the Fields being exported, simply go back to steps 2 and 3 to make your necessary adjustments. You can move freely between any of the steps in the Query process.
View Batch Records
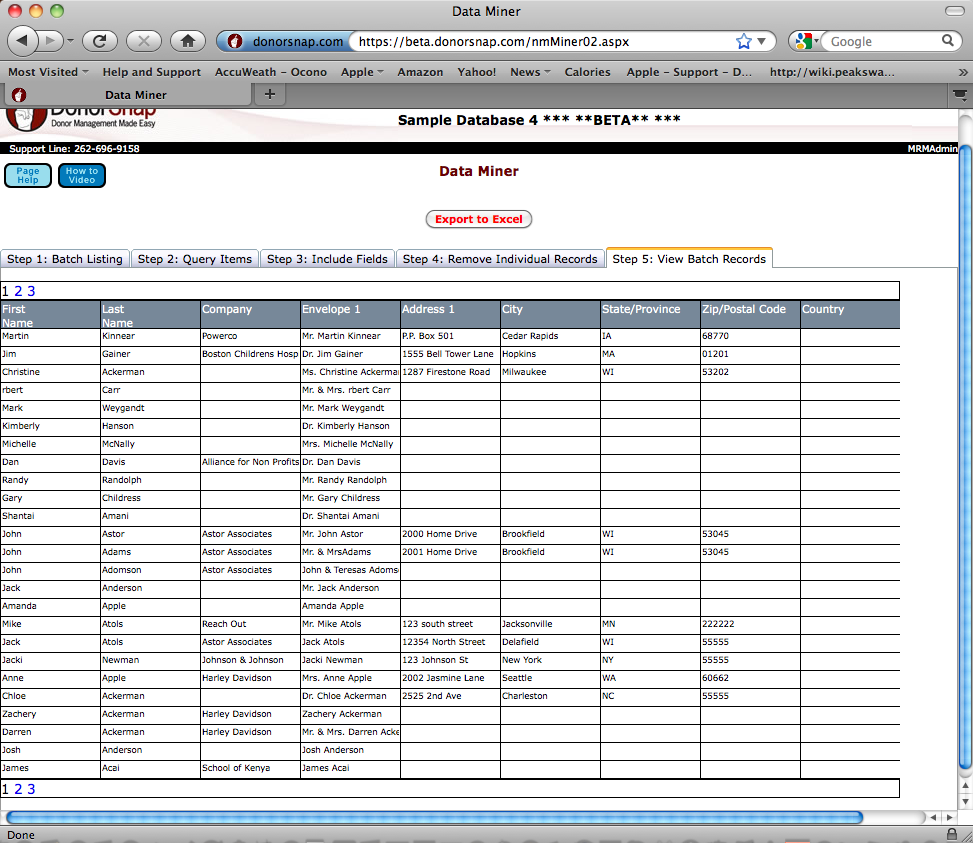
Step 5 of the DataMiner Gold query displays the records as they will be exported to Excel. Prior to exporting you should briefly review the data to determine that the query is working as you had envisioned. To export the records simply click on the “Export to Excel” button on the top of the page. If you are not satisfied with either the records being chosen or the Fields being exported, simply go back to steps 2 and 3 to make your necessary adjustments. You can move freely between any of the steps in the Query process. There is a limit of 100 records that can be marked for exclusion in any given Query. If you need to exclude more than that, either use DataMiner Platinum or do the exclusion in your resulting Excel spread sheet.