Integrating Transactions from DonorSnap to QuickBooks
The QuickBooks integration in DonorSnap will allow you to send batches of donation records to your QuickBooks Online or QuickBooks Desktop account. This will prevent any need for duplicate entry and will quickly reconcile your donations with your accounting books.
For help setting up the integration, please review the QuickBooks Online Integration Setup Guide or QuickBooks Desktop Integration Setup Guide.
Important Note: In order for a donation record to be sent to QuickBooks, it must include a validated Payment Method and Accounting Code. QBClass is optional for all transactions. These fields will match the donation to the correct general ledger account. If a donation record is missing either of these codes, it cannot create a valid journal entry/sales receipt and therefore will not be an eligible record for integration.
If using classes with QuickBooks Desktop: Your Review Transactions tab will show a red error in the QBClass column with the message of “Invalid Accounts” but this will not prevent you from integrating those transactions. Please ignore this error for the time being as that column only applies to the QuickBooks Online version of the integration.
Integrate your Donation Records with QuickBooks
Now that your DonorSnap database is connected with your QuickBooks Online or QuickBooks Desktop account and validated (using the setup guide above), you can begin sending batches of donations to QuickBooks.
Go to Processing > QuickBooks (Don’t see it there? Enable new features for your user)
Step 1: Batch Listing Tab: Add a new batch
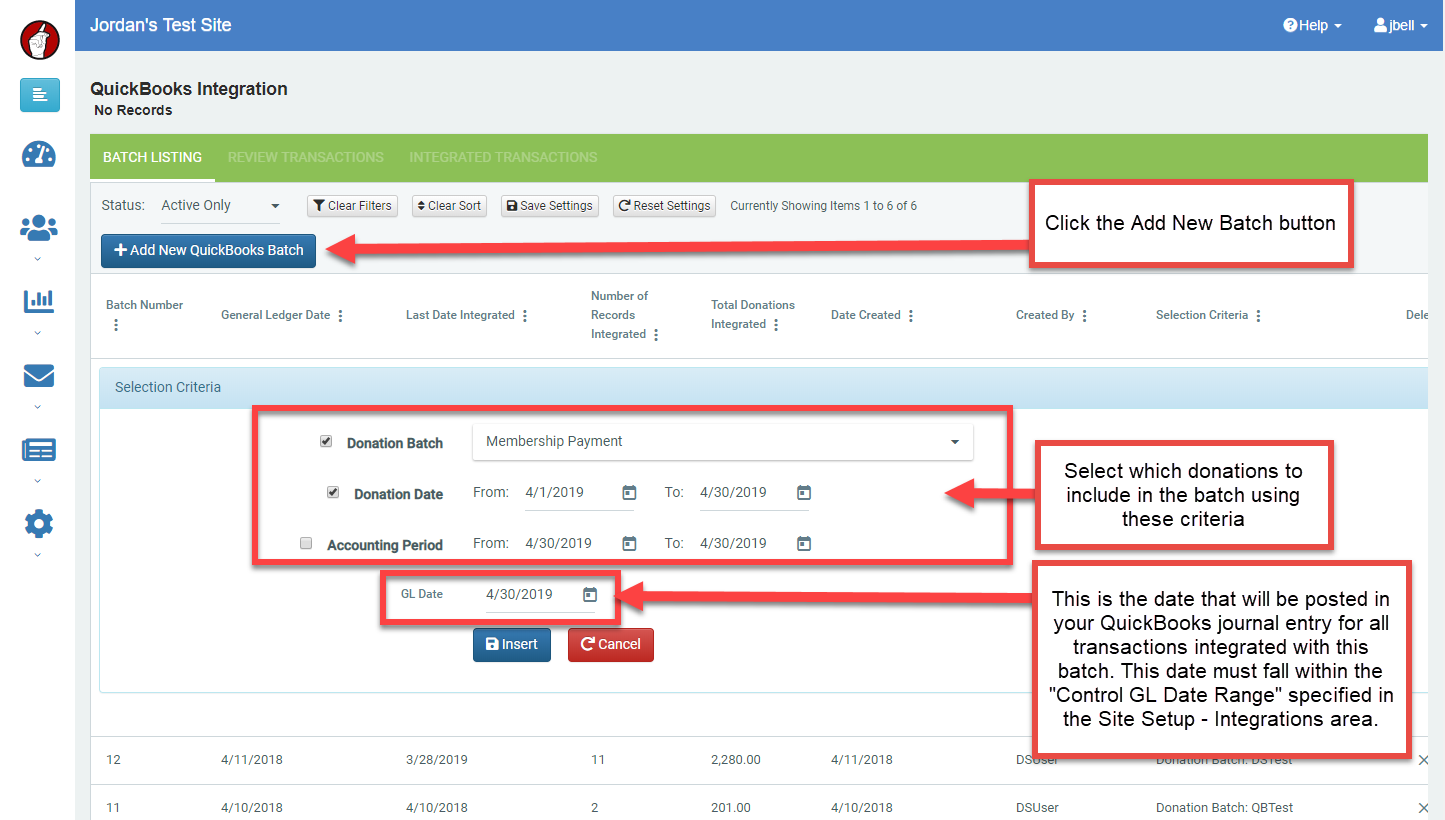
To send a donation over to QuickBooks, it must be included in a batch. To add a new batch, click the “Add” button at the top of the grid. Batches can be created based on Donation Date, Accounting Date, and/or the Batch Code used for acknowledgement letters. You must also select a single date for the journal entries/sales receipts using the GL Date field.
When new donations are added to your database, you must create a new batch to send them to QuickBooks. Once a batch is created, it cannot be edited or have new donations added to it. You must create a new batch to send new donations to QuickBooks.
Step 2: Review Transactions Tab
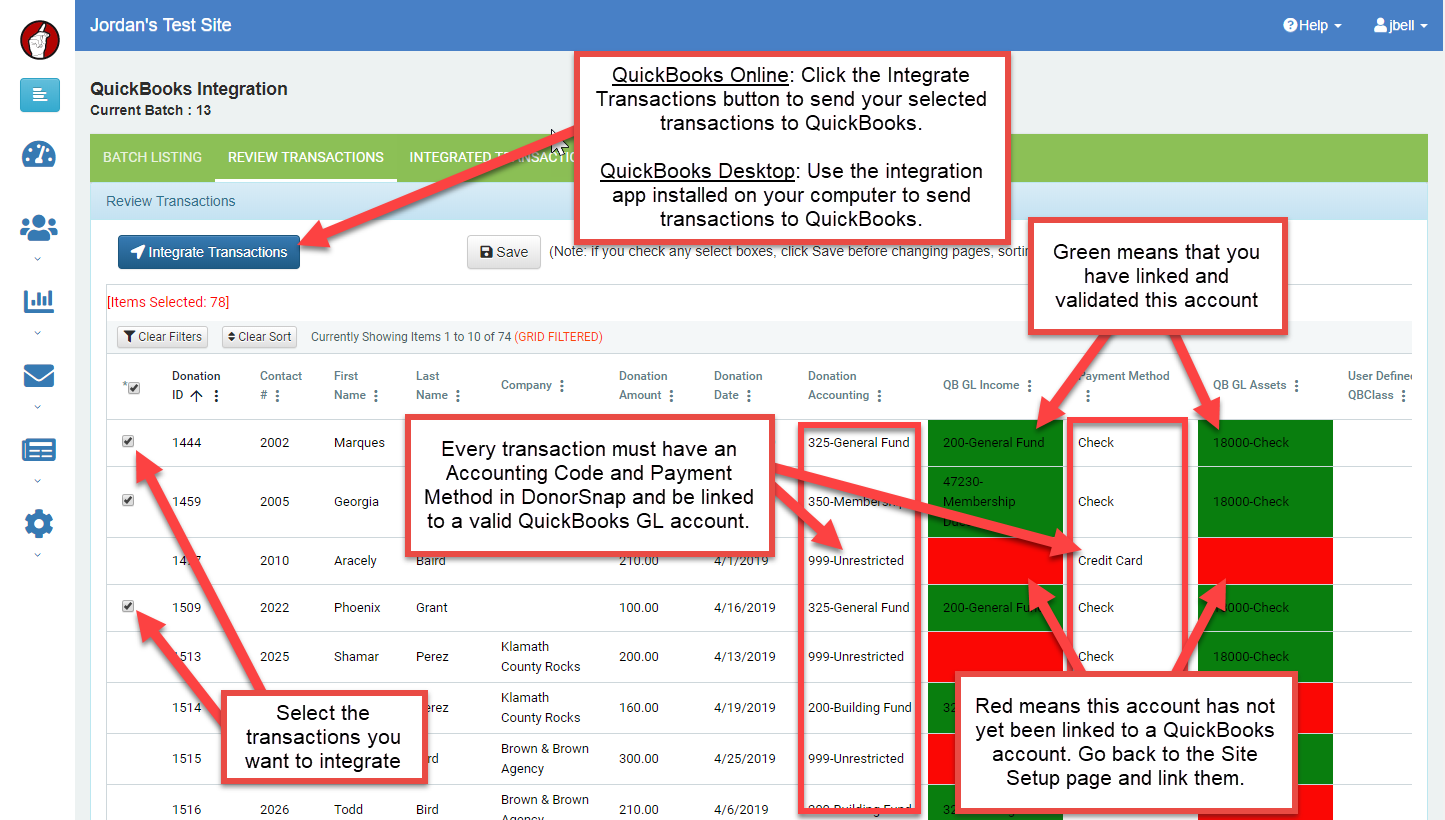
On the Review Transactions tab, you will see which records can and cannot be integrated with QuickBooks. Each record must contain both a Payment Method value and an Accounting Code value. If your integration is set up to include donor detail, the contact record must also be matched with a QuickBooks customer display name and have been validated. All items highlighted in red are either missing information, contain invalid information, or contain codes that have not yet been validated. Select all of the transactions that you wish to integrate with QuickBooks by making sure the box to the left of it is checked.
QuickBooks Online: Press the Integrate Transactions button at the bottom of the page. If codes need to be fixed or validated, you can return to this page and integrate any remaining transactions.
QuickBooks Desktop: Open the DonorSnap to QuickBooks Integration Utility that you already installed on your computer. Click the Post Transactions to QuickBooks button. Select the batch you would like to integrate and click the button at the bottom.
Integrated Transactions
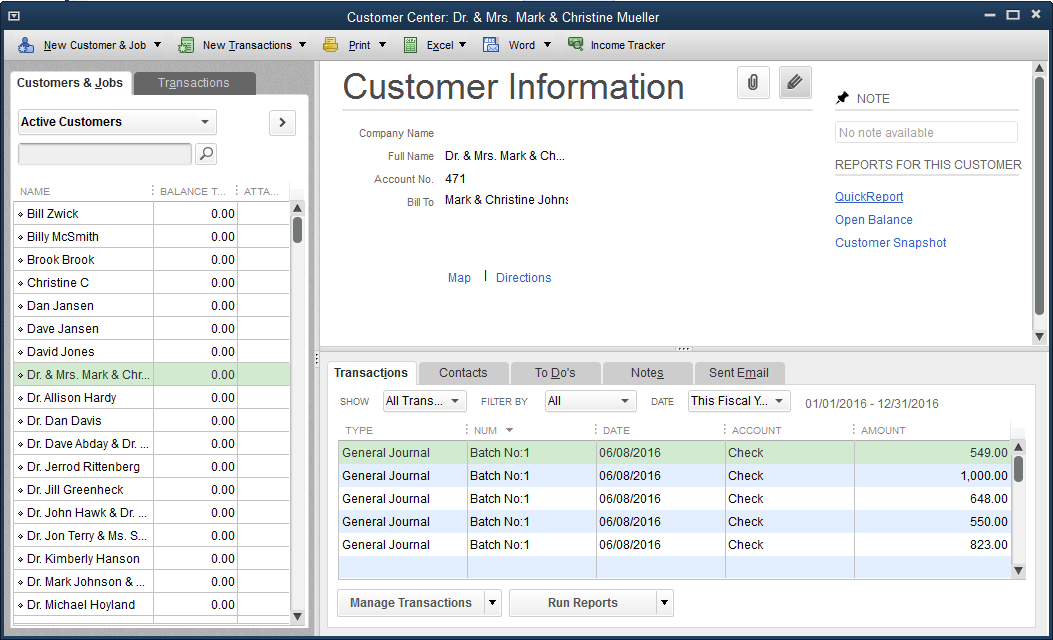
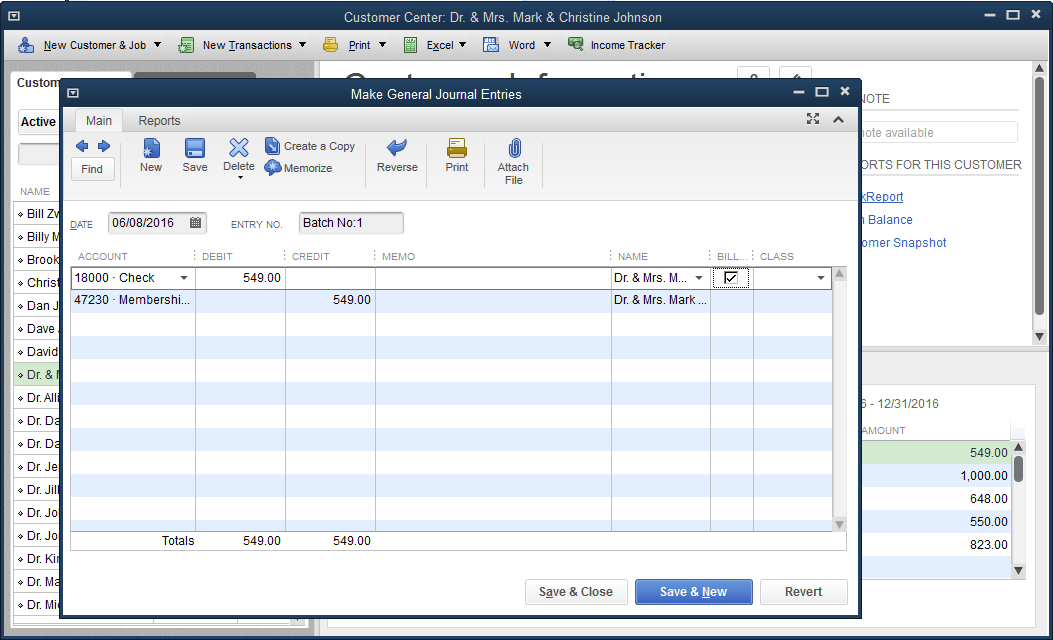
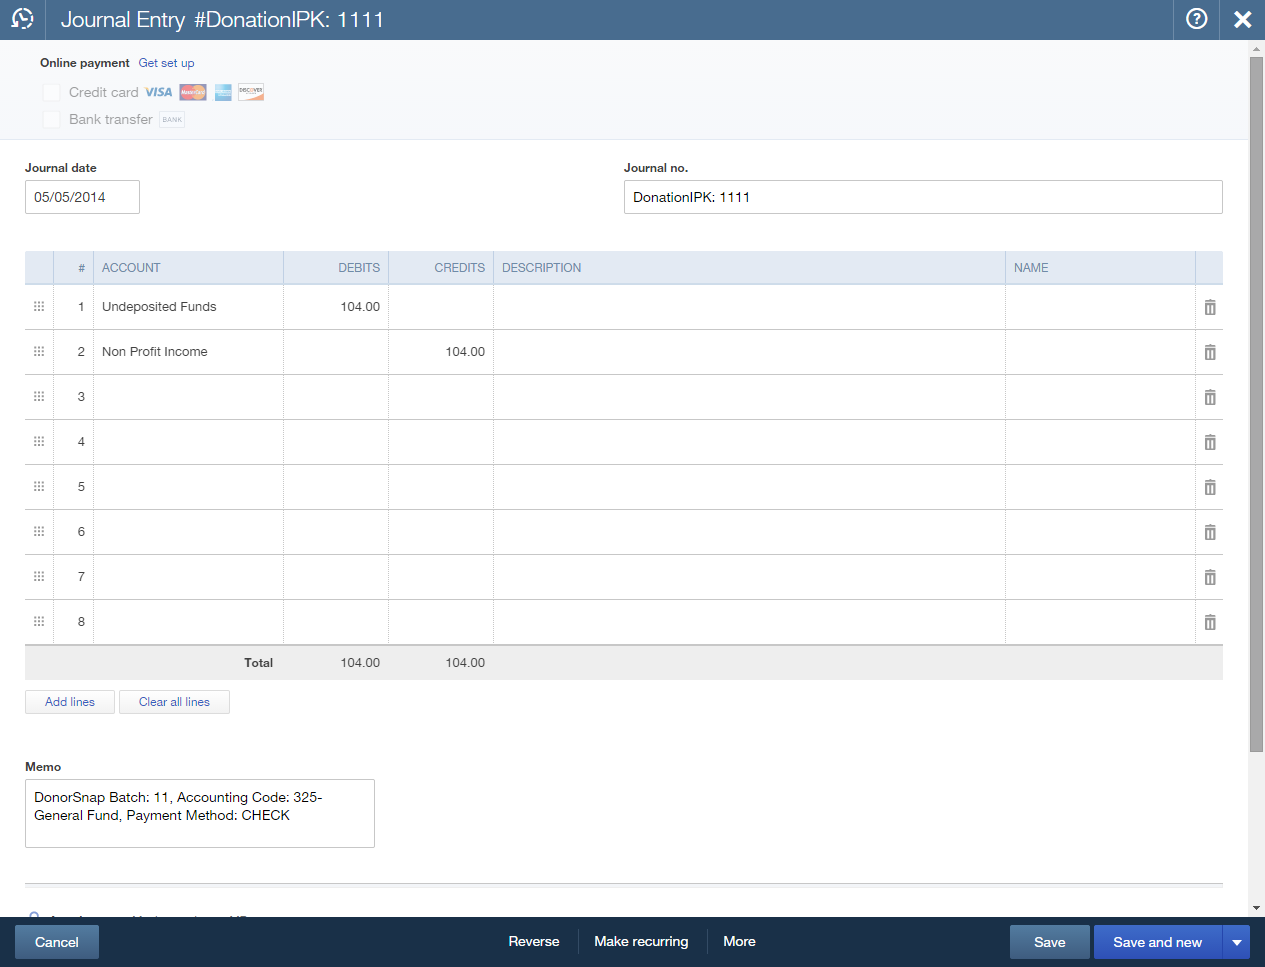
Once you have integrated a donation record, it will be moved from the Review Transactions tab to the Integrated Transactions tab. If using the General Ledger Only setting, a journal entry will be created for each donation record. If using the General Ledger and Donor Detail setting, it will be linked to the customer account matched with the corresponding DonorSnap contact. This link will be in the form of a sales receipt for QuickBooks Online and a general journal entry in the transactions tab of a customer account for QuickBooks Desktop.
General Ledger Only – Example Journal Entry (QuickBooks Online)
General Ledger and Donor Detail – Example Sales Receipt (QuickBooks Online)

General Ledger and Donor Detail – Example Journal Entry (QuickBooks Desktop)