
QuickBooks Online Integration Setup Guide
DonorSnap is able to integrate your database with your QuickBooks Online account. This integration requires some setup before it can be used the first time, but after it has been configured, donations can be easily sent to QuickBooks in batches. If you are using the installed desktop version, read the QuickBooks Desktop Integration Setup Guide.

This integration is one directional. Donation records can only be transferred from DonorSnap to QuickBooks.
Please note that DonorSnap is not able to provide any consulting or advice related to accounting practices or QuickBooks. You will need to involve your accountant or someone else that is well versed in QuickBooks in order to complete the setup of your integration.
Setting Up the Integration
Authorize DonorSnap to access your QuickBooks Online account
1. Log in to your DonorSnap account. Go to Maintenance > Site Setup > Integrations and click the QuickBooks Integration tab
2. Click the Authorize button and follow the directions from Intuit. You’ll be asked to sign in to your QuickBooks account if you are not already. If you have only one company account tied to this username, then it will automatically select it for you.
a)
b) 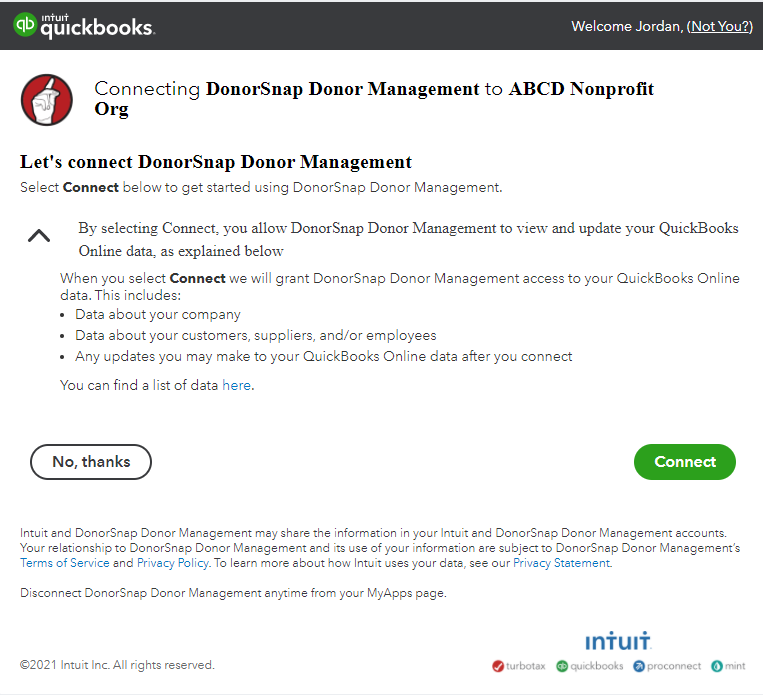
c) 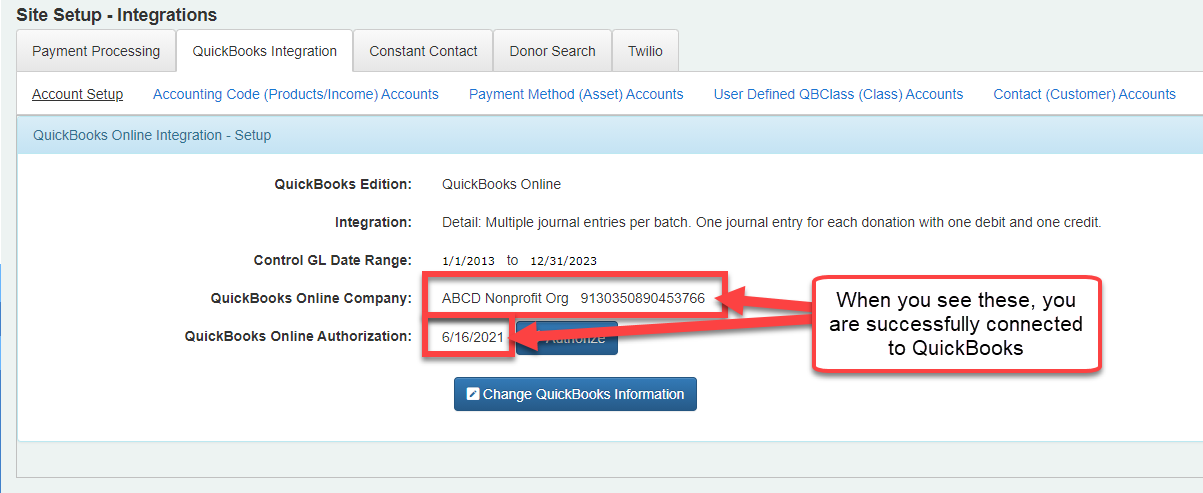
Configuring your QuickBooks integration settings:
Go to Maintenance > Site Setup > Integrations and click the QuickBooks Integration tab
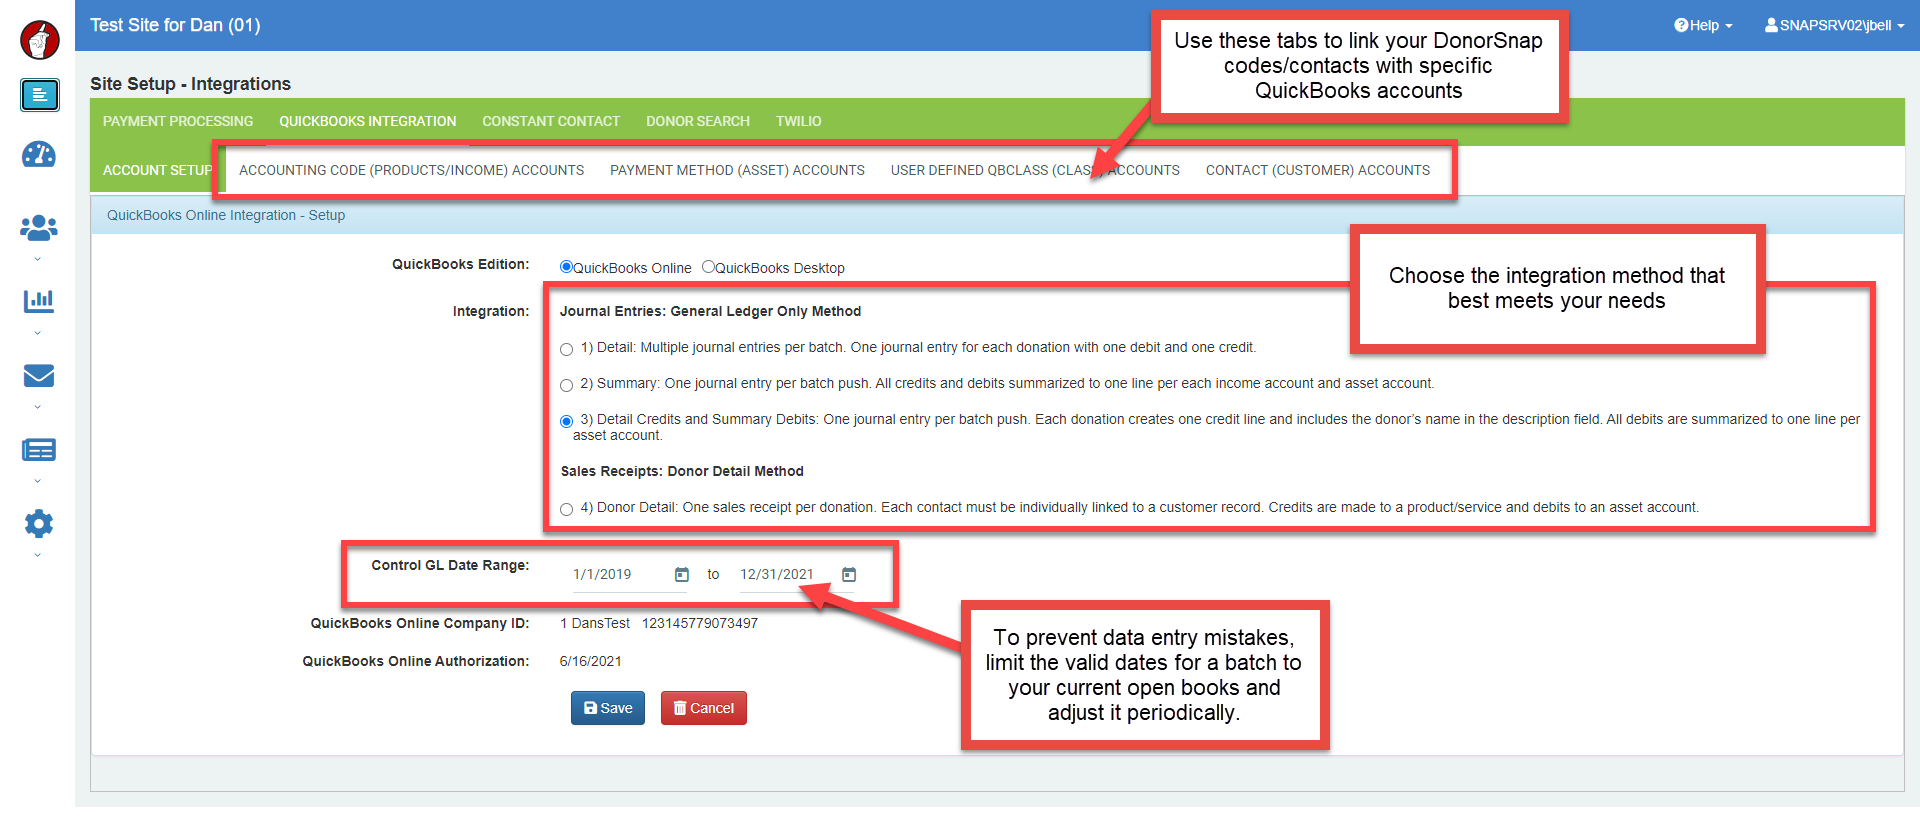
The next step will require consulting with your bookkeeper. There are four methods of integrating your DonorSnap donation records with QuickBooks. The first three create journal entries in various forms and do not link to a customer record in QuickBooks. The fourth option creates sales receipts that are linked to a customer record in QuickBooks.
Journal Entries: General Ledger Only Methods
These options will require the least amount of setup. You will not need to link up each DonorSnap contact to a customer record in QuickBooks. A varying level of details is sent to QuickBooks depending on the method chosen
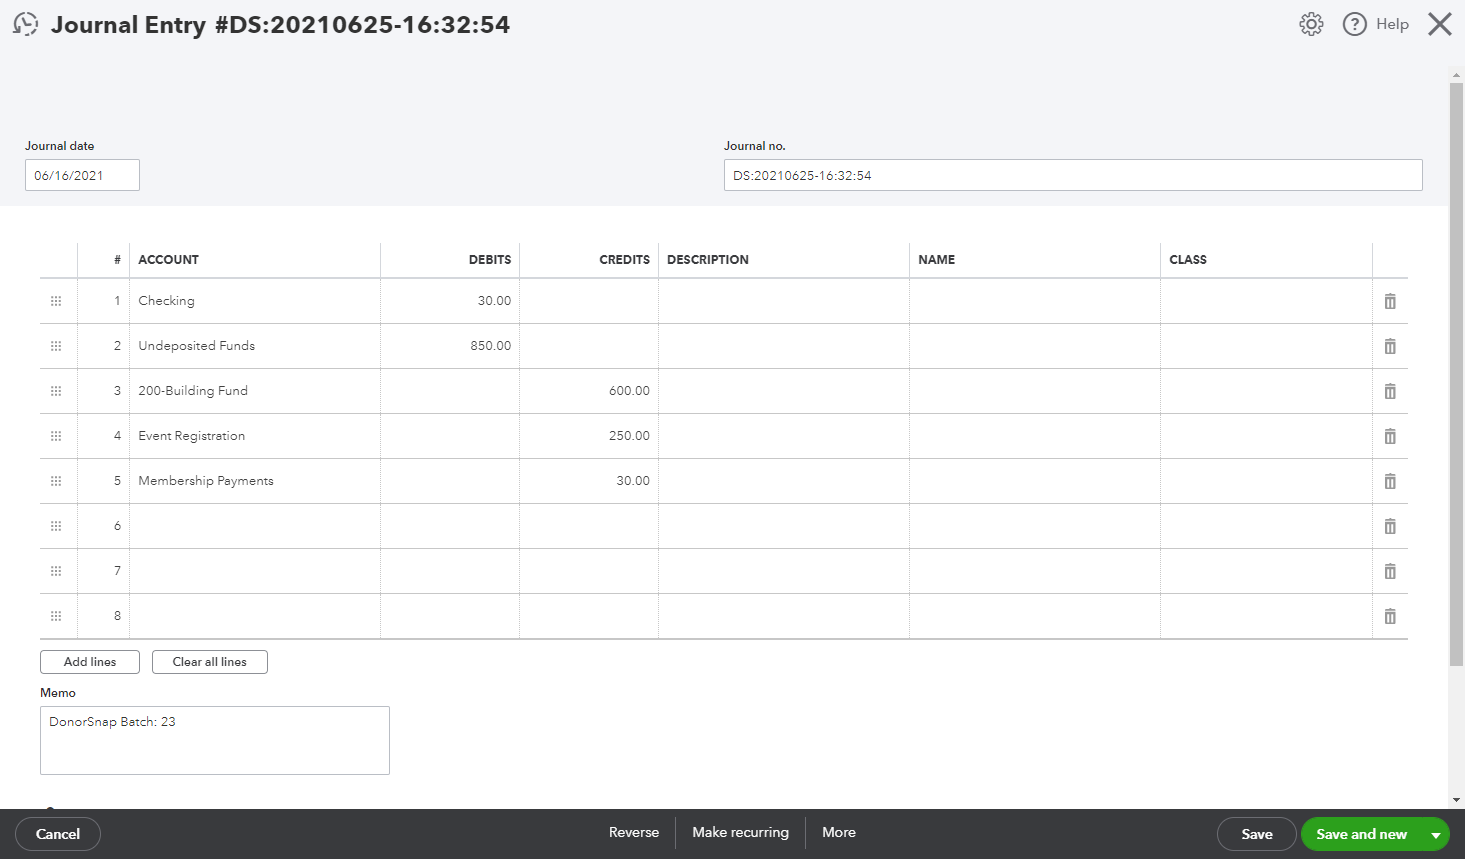
#1 Journal Entry – Detail
Multiple journal entries per batch. One journal entry for each donation with one debit and one credit.
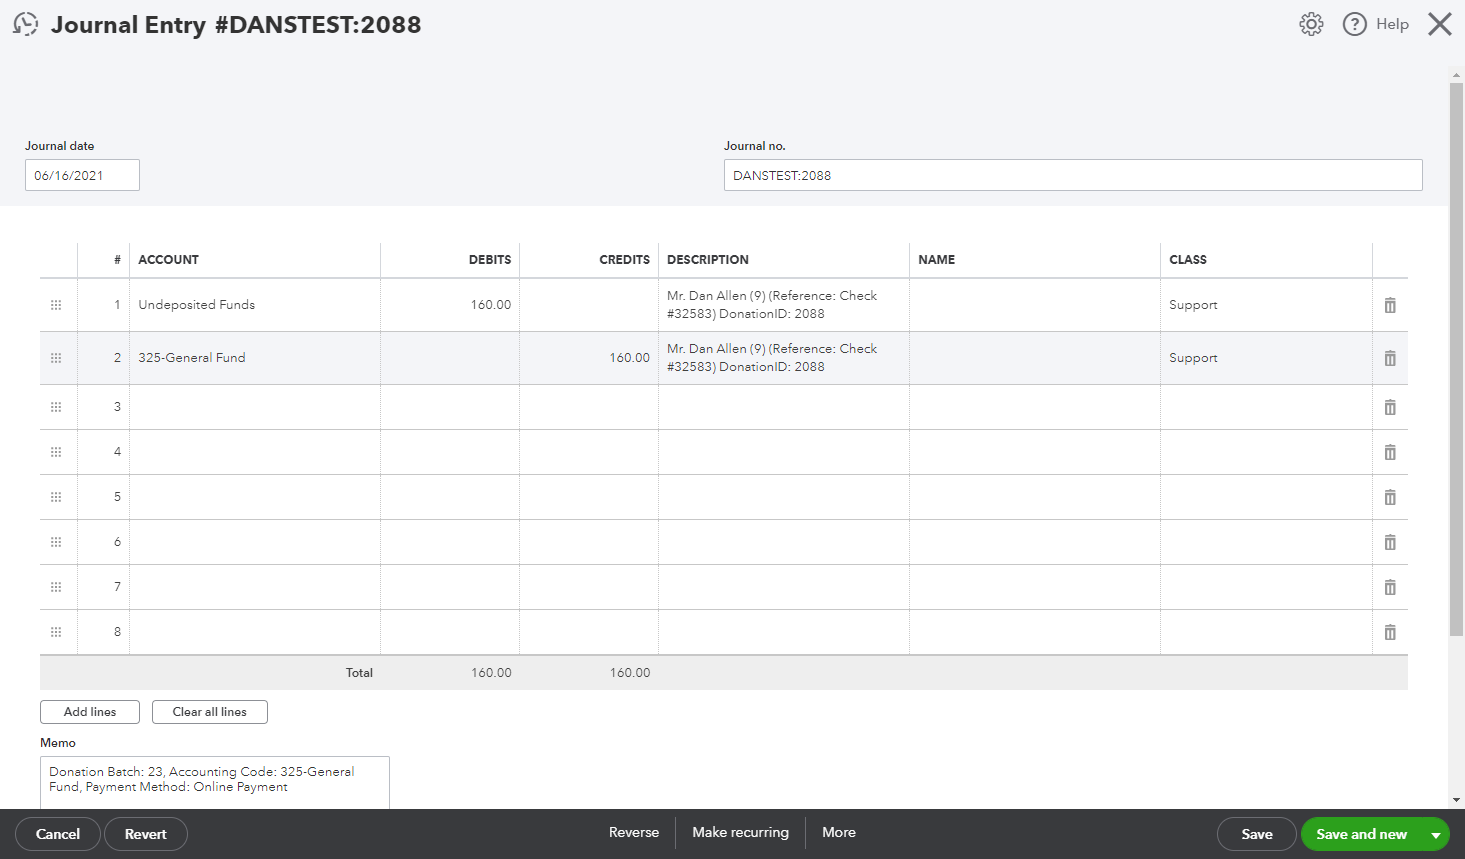
This option will create a journal entry with a debit in your asset account and a credit in your income account for each donation record you push to QuickBooks. It will also include a description stating the Acknowledgement, ContactIPK, Reference #, and DonationIPK. The memo field includes the batch number that the donation was integrated using along with the DonorSnap fields Accounting Code and Payment Method.
An example of what each transaction’s journal entry will look like:
#2 Journal Entry – Summary
One journal entry per batch push. All credits and debits summarized to one line per each income account and asset account.
This option will create one journal entry that includes a summarized version of all selected transactions in your batch. Each income and asset account used in the batch will have one summary line in the journal entry with subtotaled amounts. If using the Class field, each summary line will also be broken down to each specific Class. The memo field includes the batch number that these donations were integrated through.
An example of what each summary journal entry will look like:
#3 Journal Entry – Detail Credits and Summary Debits
One journal entry per batch push. Each donation creates one credit line and includes the donor’s name in the description field. All debits are summarized to one line per asset account.
This option creates one journal entry with a combination of methods. It will show you the detailed side of each transaction credit along with the name of the donor, but it will use summary lines for the debit side. The memo field includes the batch number the donations were integrated through. The Description field for the credit lines includes the Acknowledgement, ContactIPK, Reference #, and DonationIPK.

Sales Receipts: Donor Detail Method
#4 Sales Receipt – Donor Detail
One sales receipt per donation. Each contact must be individually linked to a customer record. Credits are made to a product/service and debits to an asset account.
This option will require considerably more setup. Each contact in DonorSnap will need to be individually matched with the QuickBooks Display Name field in their customer account. This method will create a sales receipt for each customer which will include a description stating the batch that the donation was integrated using and the DonationIPK number to identify which donation it was just like the one above. The only difference is that it will be credited to a customer account using a sales receipt instead of a journal entry.
An example of what a Sales Receipt will look like in QuickBooks:

Link your DonorSnap Codes with your QuickBooks Accounts
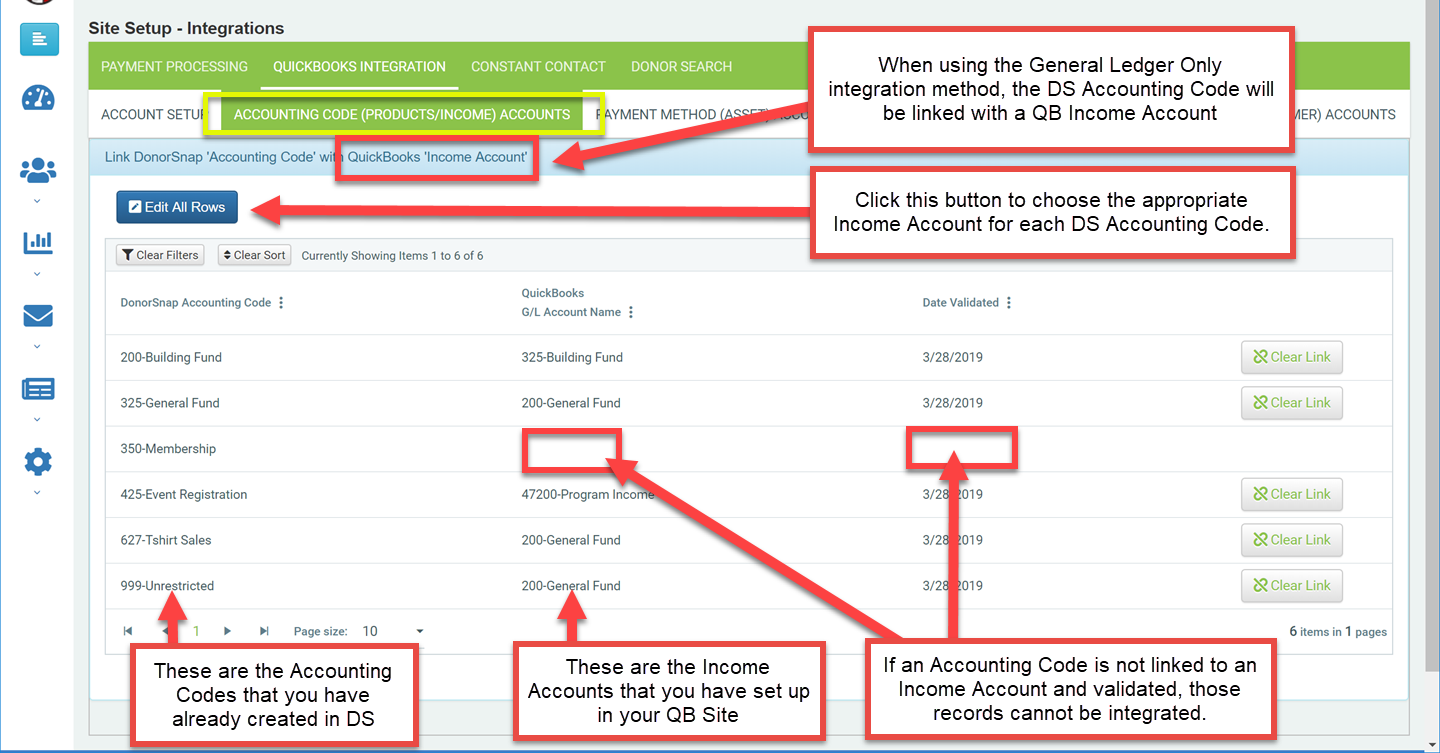
1. Link your DonorSnap Accounting Codes with the appropriate Income Accounts (general ledger only setting) or Product/Service Name (donor detail setting) from your QuickBooks and validate them.
General Ledger Only: Link with Income Accounts
Donor Detail: Link with Product/Service Name

2. Link your DonorSnap Payment Method Codes with the appropriate asset accounts from your QuickBooks and validate them.

3. Optional: If using Classes in QuickBooks, create a user defined field called QBClass and link them together.
A. Go to Maintenance > Site Setup > Field and Screen Customization and click the User Defined Setup tab.
B. Change the activity table from Contact to Donation and click the “Add New Record” button.
C. Label your field QBClass and make it a single select dropdown field.
D. Click the sub-tab “Lookups for User Defined Controls” and add the options you need under the QBClass field.
E. Switch to the QuickBooks Integration tab of the Site Setup page, and click the “User Defined QBClass (Class) Accounts” sub-tab.
F. Link your QBClass options in DonorSnap to the Classes in QuickBooks.
4. (Only for Donor Detail integration method) Link your DonorSnap Contacts with the appropriate Display Name from your QuickBooks and validate them.

(Note: If your QuickBooks company account has under 500 customer records, the screen above will load a dropdown for you to select which customer should be linked. If you have more than 500, then in order to prevent the page from timing out, a plain text field will show up and you will need to type in the name exactly as it appears in QuickBooks. See below.)
Here is an example of where the Display Name which QuickBooks uses as the unique ID field for customer accounts can be found: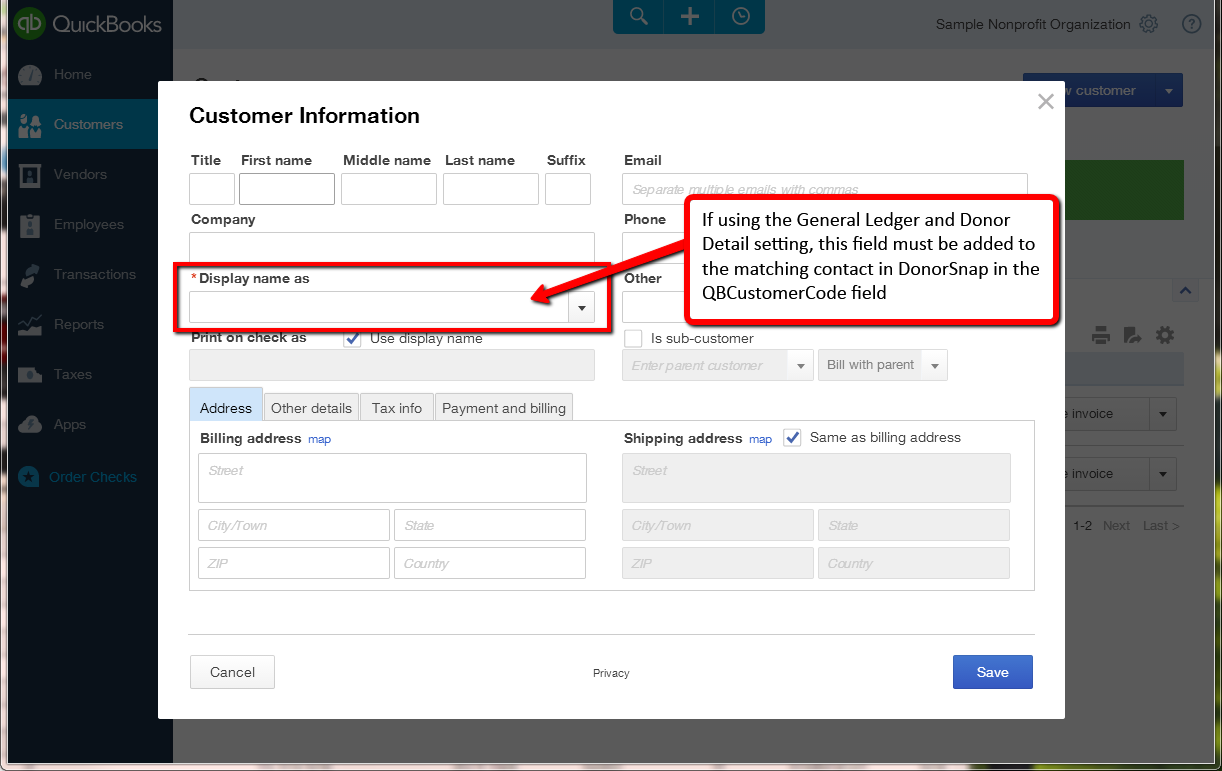
Next Step: Guide to integrating your donation records with QuickBooks